
Appearance
Events
Events are the core of Playout — each one represents a live broadcast.
Viewing Events
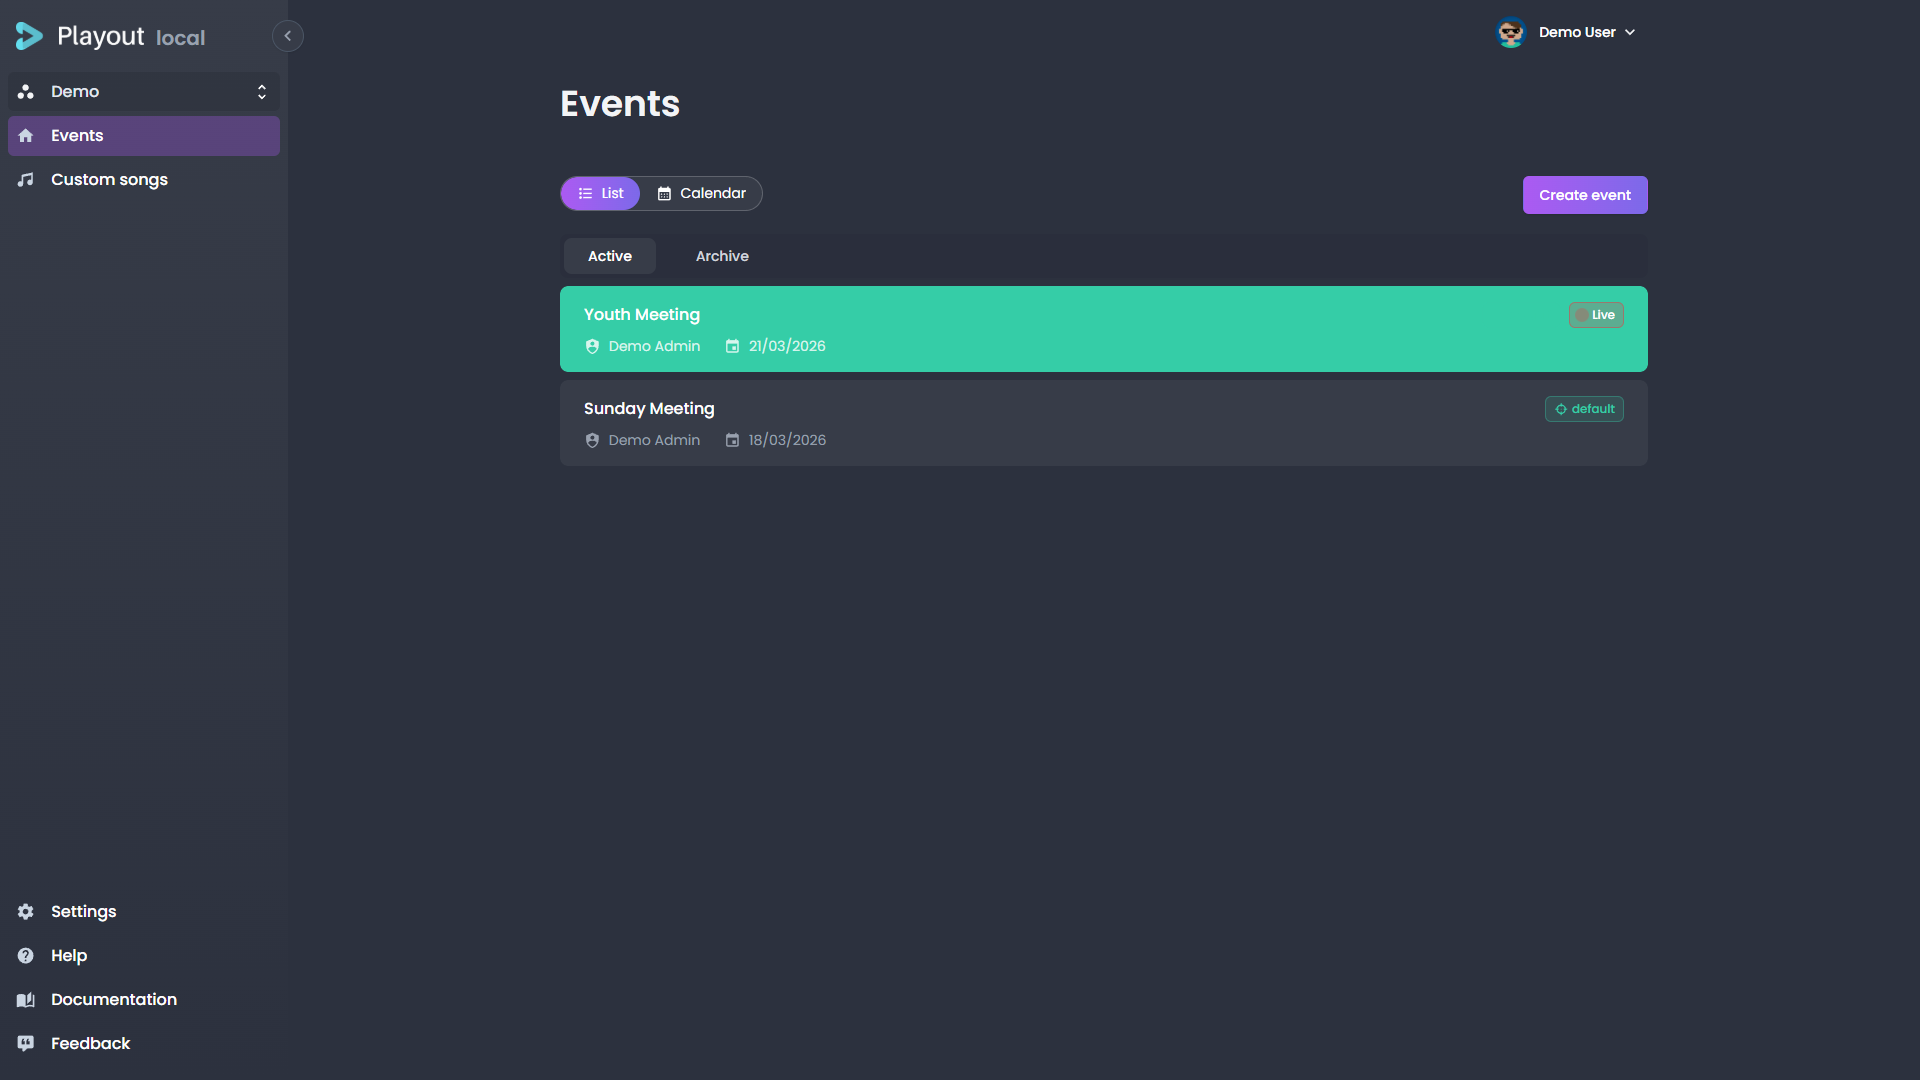
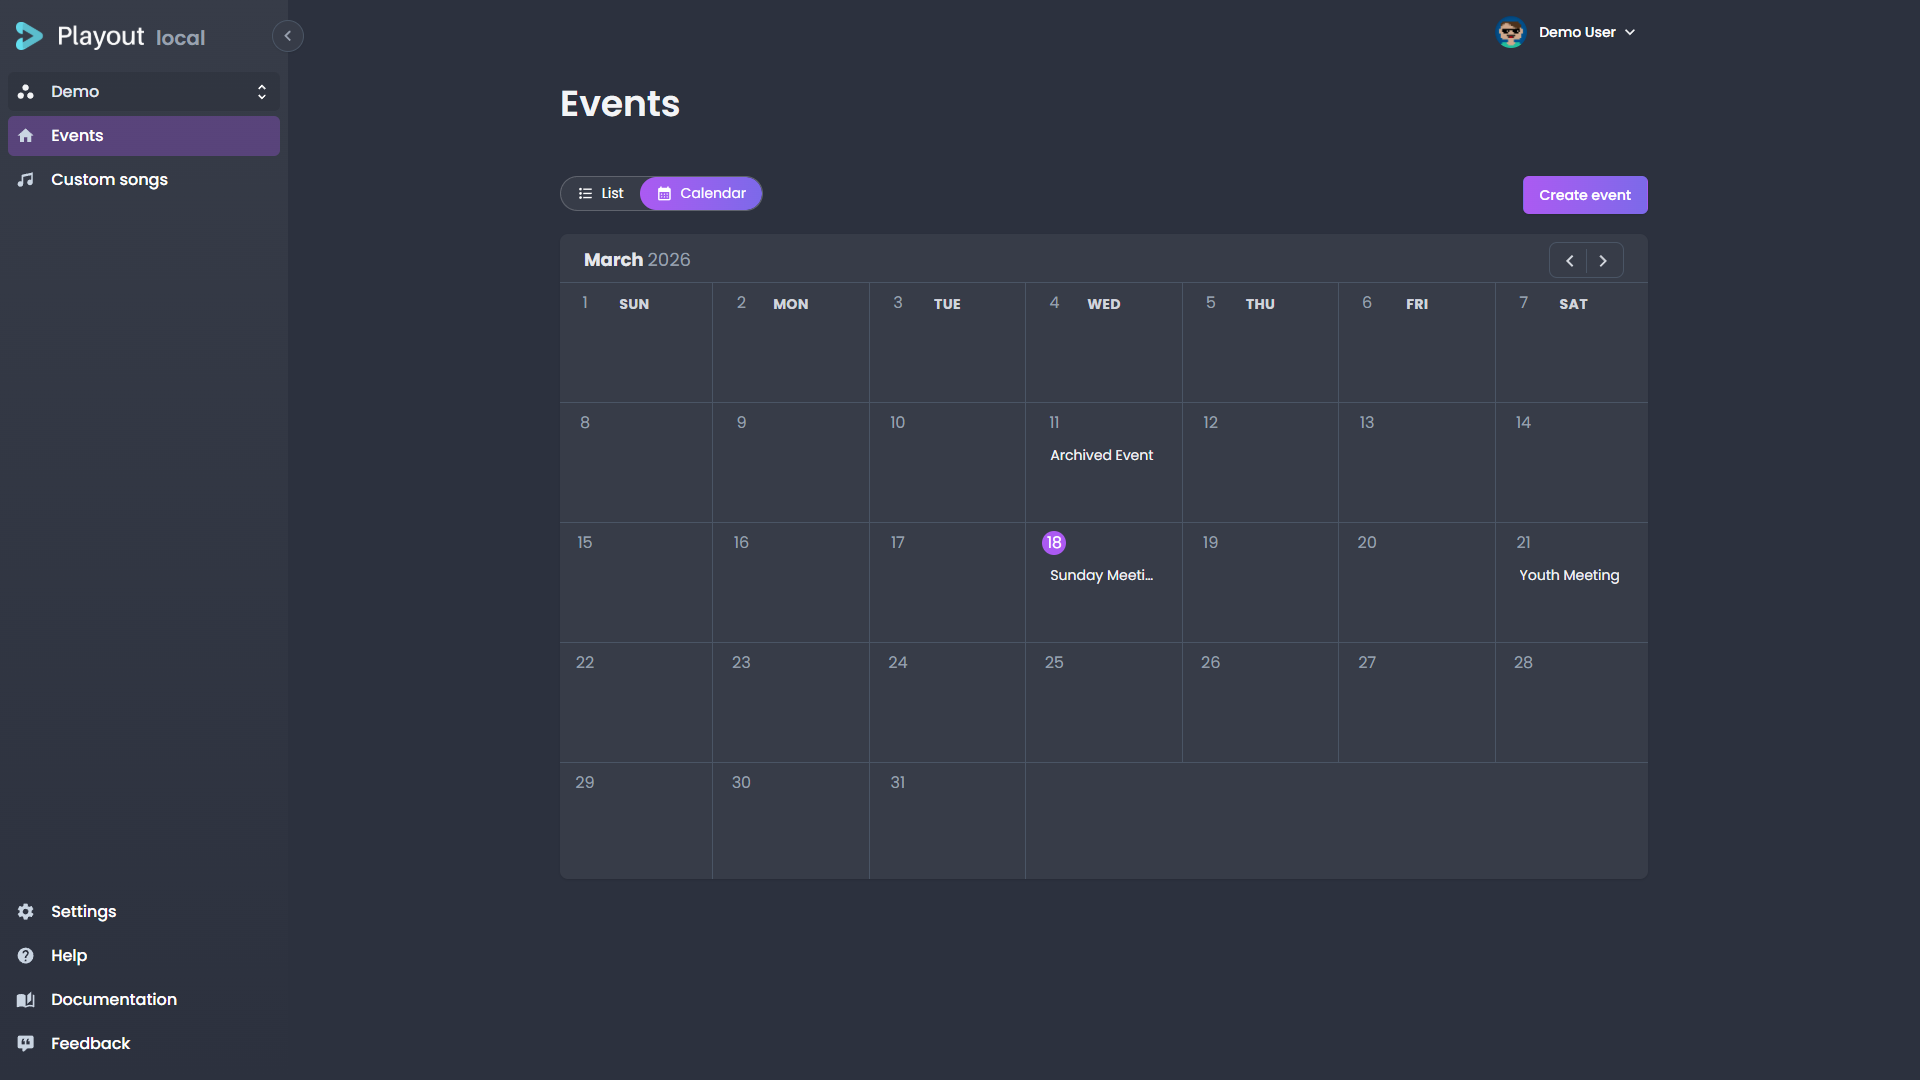
The Events page is your landing page after selecting a tenant. It offers two views:
List View
The default view shows your events as a chronological list. Events are grouped and color-coded by status.
Calendar View
Switch to calendar view using the toggle at the top of the page. This shows your events on a monthly calendar.
Creating an Event
Click the Create event button in the top-right corner to open the event creation dialog.
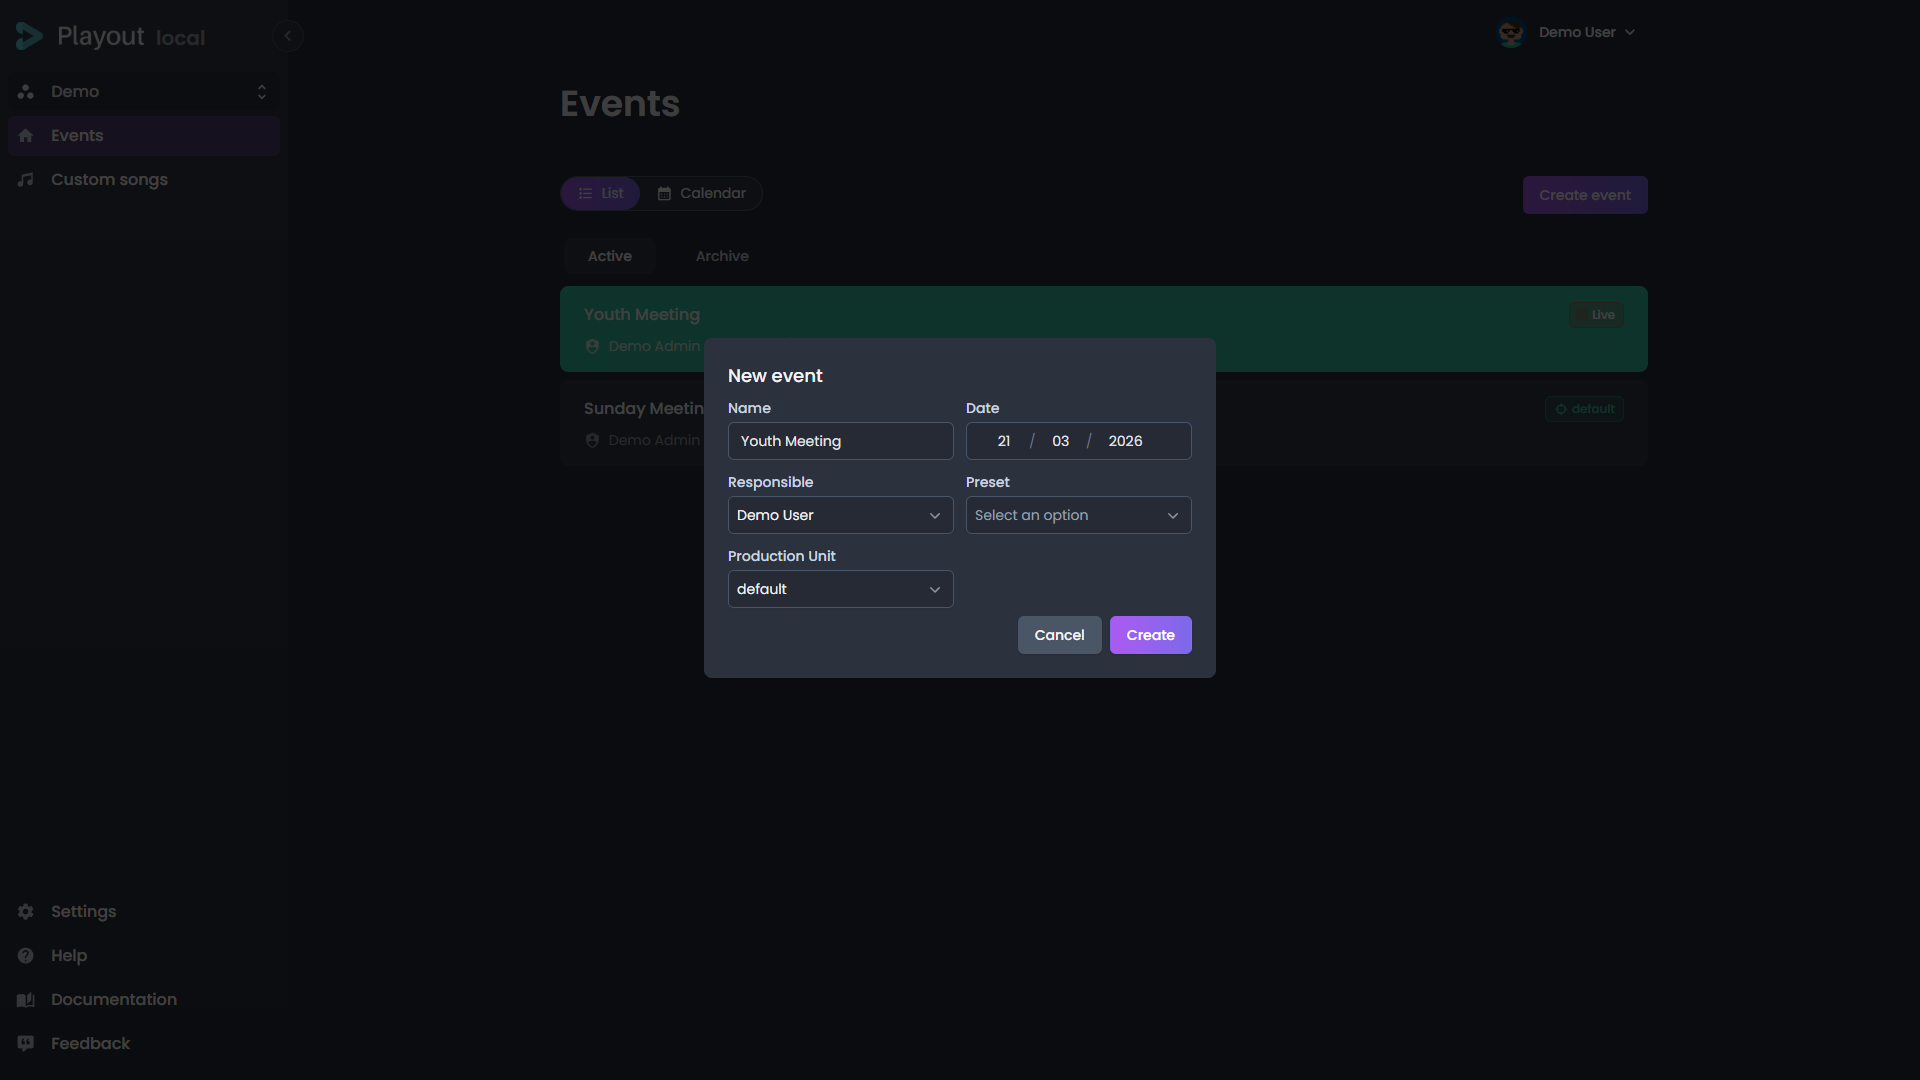
Fill in the following fields:
| Field | Description |
|---|---|
| Event name | A descriptive name for the event |
| Date | The date and time of the event |
| Responsible | The person responsible for this event |
| Template | An event template to apply (optional) — sets up screens and other shared settings (see Event Templates) |
| Production unit | Which production unit to use for streaming |
Click Create to add the event. It will appear in your event list.
Event Dashboard
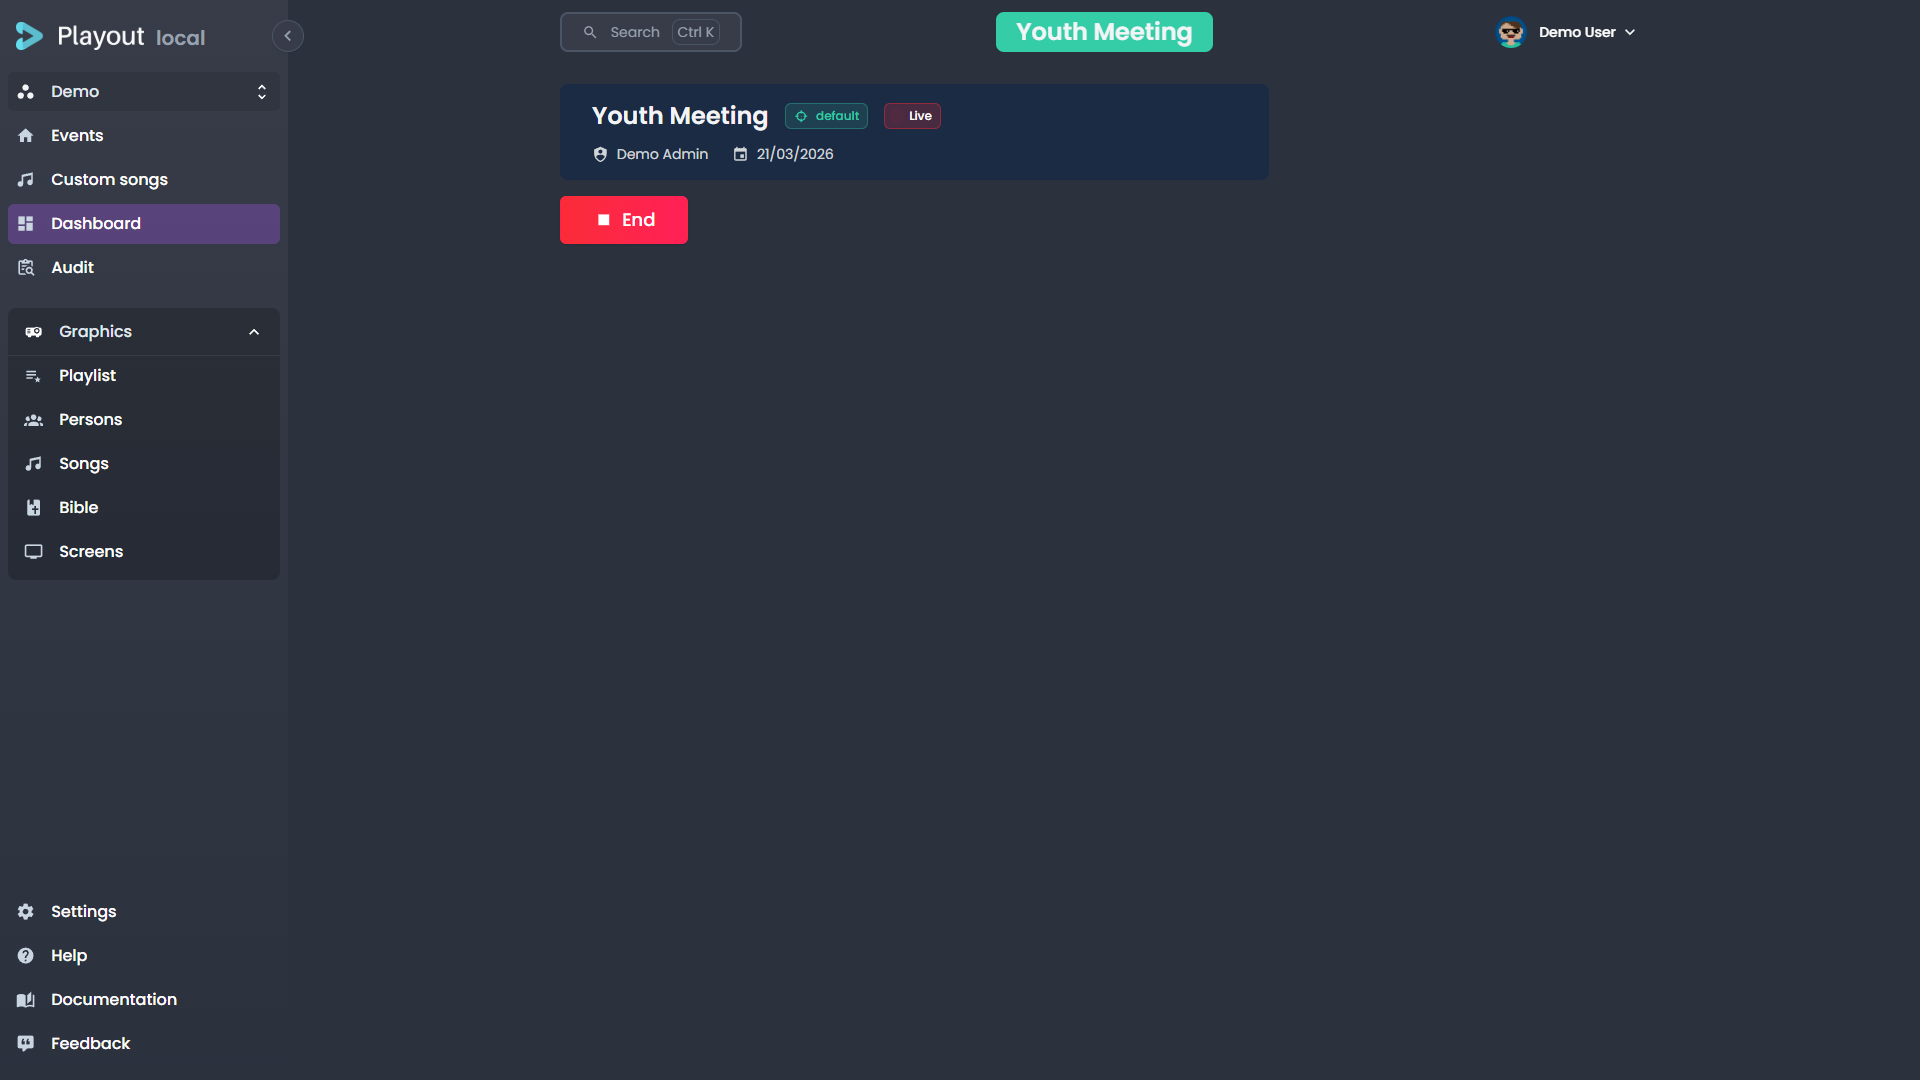
Click an event to open it. You land on the Dashboard, which shows the event's current status and provides controls.
Event Templates
An event template is a reusable starting point for the settings your events tend to share. Instead of re-entering the same configuration for every event, you save it once as a template and apply it with a click.
INFO
Templates were called presets until v2.5. Some menus still say preset; they are the same thing.
A template can bundle each of the following. It carries only the ones switched on in Settings → Presets; the rest are left untouched on the event.
| Setting | What it covers |
|---|---|
| Screens | The full screen-output layout (see Graphics & Overlays → Screens) |
| Look | The styling look the event's overlays use, which also supplies its accent colour |
| Broadcasted | Whether the event is broadcast |
| Location | The event's location |
| Streaming access rules | Who is allowed to watch the stream (see Streaming → Access rules) |
| Auto-archive | The automatic archiving policy |
| Streaming description | The shared description shown to viewers |
The streaming title is intentionally left out — it's specific to each event and defaults to the event name. So is the colour: an event takes its accent from the look the template carries, and can override it individually from Edit event.
TIP
A template stamps: applying it copies these values onto the event, and editing the template afterwards does not change events already created from it. A lookpoints: an event stores which look it uses, so editing that look restyles every event using it, live and including one on air.
Templates are managed from the Screens page of an event, using the template menu:
- Save as a new template — Captures the current event's screens and shared settings as a new, named template.
- Apply a template — Overwrites this event's screens and shared settings with the template's values.
- Save changes to «name» — Updates the selected template to match the event's current screens and settings.
- Delete a template — Removes a template you no longer need.
The menu shows a modified indicator when the event has drifted from the template it came from, so you can tell at a glance whether the two are still in sync. The event dashboard names the template the event came from, and repeats that indicator.
To see what a template carries — and to change its shared settings, rename it or delete it without opening an event — use Settings → Presets. Each shared setting is shown as carried or not: a setting the template does not carry is left untouched on the event when the template is applied.
WARNING
Applying a template overwrites every shared setting the template carries — look, location, broadcasted state, and streaming configuration — not just its screens. Use it to reset an event to a known starting point, not to tweak a single setting. A setting the template does not carry is left untouched; Settings → Presets shows which is which.
TIP
You can also choose a template when creating an event. The template is applied as the event is created, giving you a fully configured event from the start. The template controls are hidden once an event is archived.
Event Status
Each event has one of the following statuses:
| Status | Meaning |
|---|---|
| Active | Created but not yet live |
| Live | Currently broadcasting |
| Recording | Being recorded |
| Replay | Available for replay |
| Archived | Stored for later reference |
Starting an Event
Click the green Start button to take the event live. This sets the event as the current active event for your tenant and enables all overlay controls.
Ending an Event
Click the red End button to take the event off air. A confirmation dialog will appear — confirm to end the broadcast. You can restart the event afterwards if needed.
Archiving an Event
When an event is no longer needed, click Archive to move it out of the active list. Archived events can still be viewed but won't clutter your main event list.
WARNING
If your event has a replay/VOD attached, archiving will also archive the VOD asset.
Restoring an Event
Archived events can be brought back by clicking Restore on the dashboard.
Deleting an Event
Click Delete on an archived event to permanently remove it and all associated data. This action cannot be undone.
DANGER
Deleting an event permanently removes all data, including program elements, audit logs, and streaming records.
Audit Log
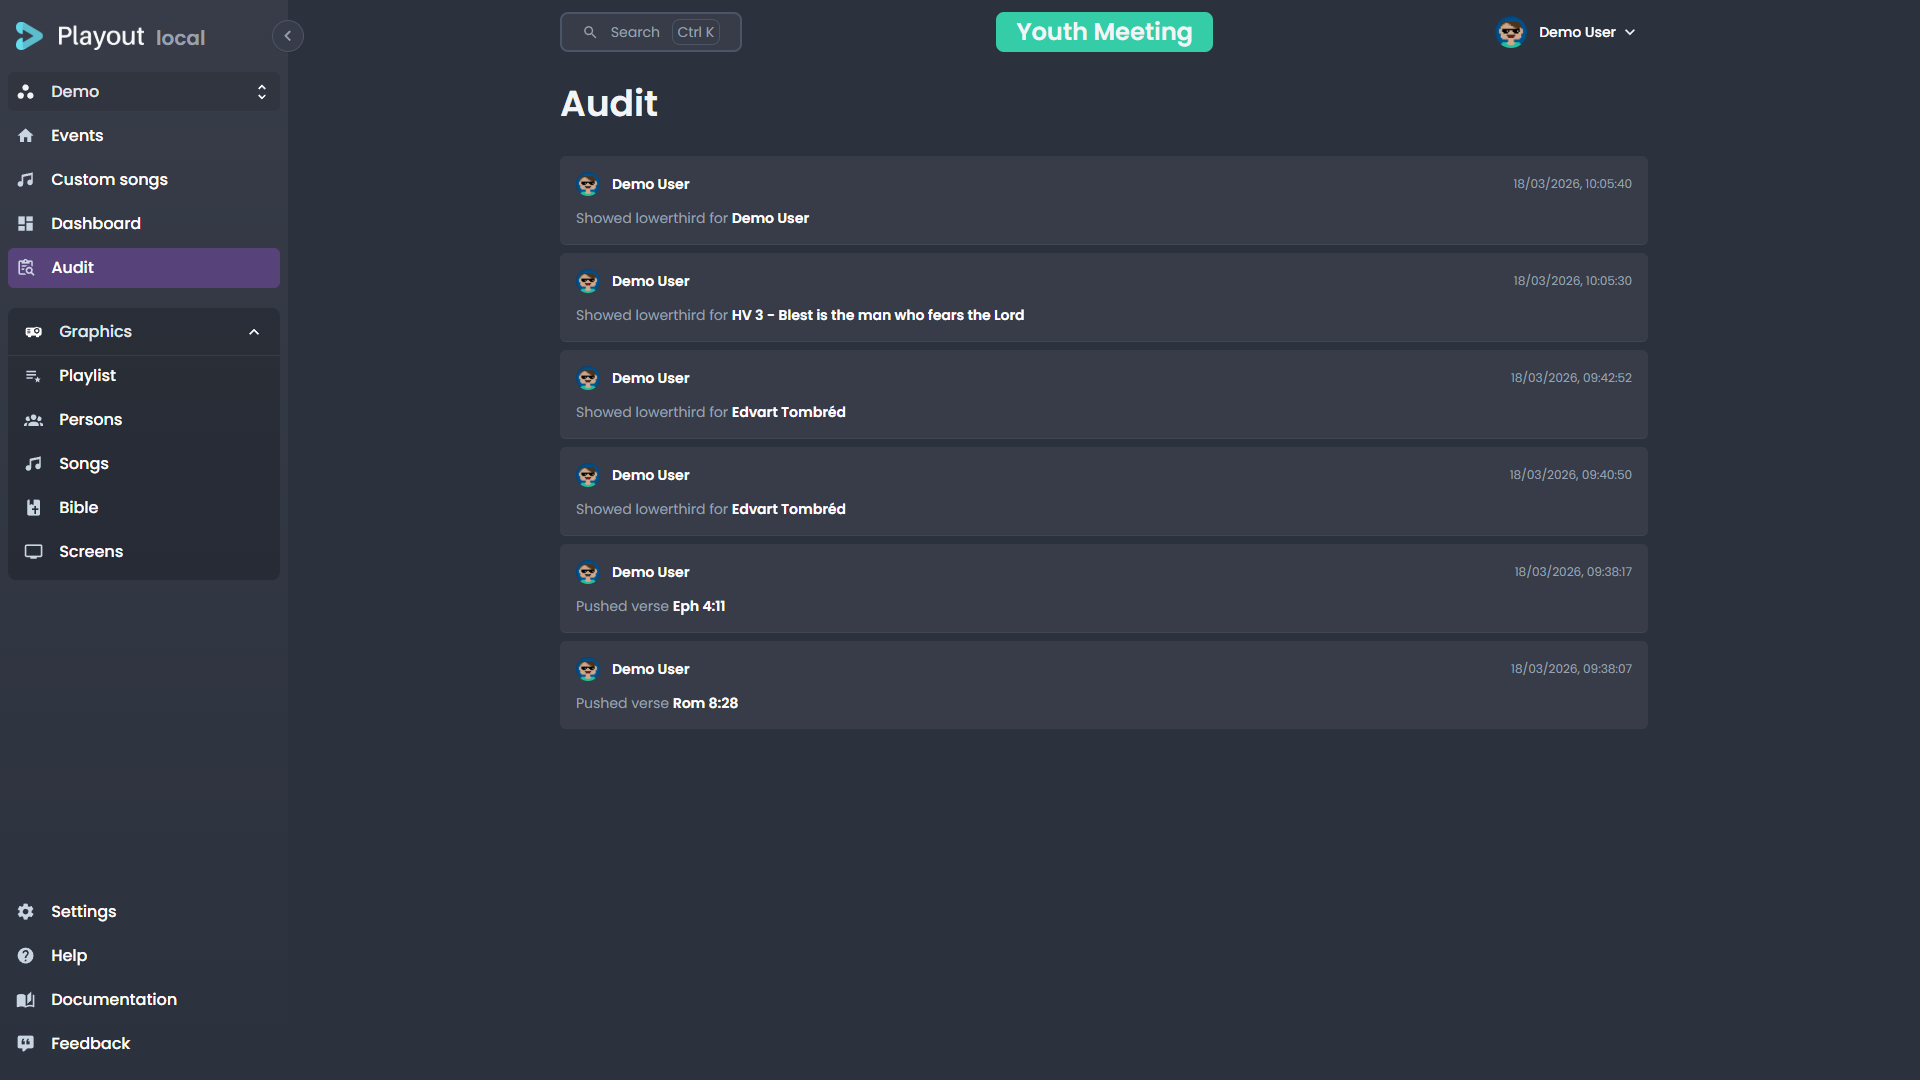
The Audit tab (accessible from the sidebar when an event is open) shows a history of actions taken during the event. Each entry records who did it, what action they took, on what subject, and when.
Reading the timeline
Entries are grouped by day — Today, Yesterday, then the date — newest first, with the number of actions that day at the right of each heading. Each row shows:
- A coloured dot for the kind of action: green when something was shown, enabled or sent live, grey when it was hidden, disabled or paused, red for destructive actions such as clearing the playlist.
- The operator's name, shown once for a run of consecutive actions by the same person.
- The action and its target (the person, song, verse or playlist item).
- The time, to the second.
When the same person repeats the same action on the same target several times in a row — re-showing a lower third, say — the rows collapse into one with a ×N badge. Click the badge to see each individual time.
Finding an action
Type in the search box to filter by person, action or target. Words can be in any order, so johan psalm finds every verse Johan pushed from the Psalms. When the log holds more than one kind of action, chips next to the search box narrow it to On air, Off air or Deletions.
What is recorded
The audit log captures broadcast-state changes — anything that affects what the audience sees. Routine navigation (advancing verses, scrolling through the catalog) is not recorded.
| Action | Logged when… |
|---|---|
| Showed lowerthird for | A person, song, or Bible verse is sent to screen as a lower third |
| Hid lowerthird | A lower third is dismissed from screen |
| Showed info lowerthird / Hid info lowerthird | A custom info banner is shown or hidden |
| Pushed verse / Hid verse | A Bible verse overlay is shown or hidden |
| Enabled bible blackout / Disabled bible blackout | The Bible blackout toggle is flipped |
| Showed program banner / Hid program banner | The playlist banner overlay is toggled on or off |
| Went live with queue element / Stopped queue element | A playlist item is made live or stopped |
| Enabled song blackout / Disabled song blackout | The song blackout toggle is flipped |
| Cleared the playlist | Every item is removed from the playlist |
TIP
Automatic hides (such as a lower third disappearing on its own after its configured duration) are not audited — only operator actions are. The audit log is intended to answer "who put this on screen" rather than "what is currently on screen."
What's Next?
- Graphics & Overlays — Control what your audience sees on screen
- Streaming — Monitor and manage the live stream