
Appearance
Settings
The Settings page is available to admins only and lets you configure all aspects of your tenant.
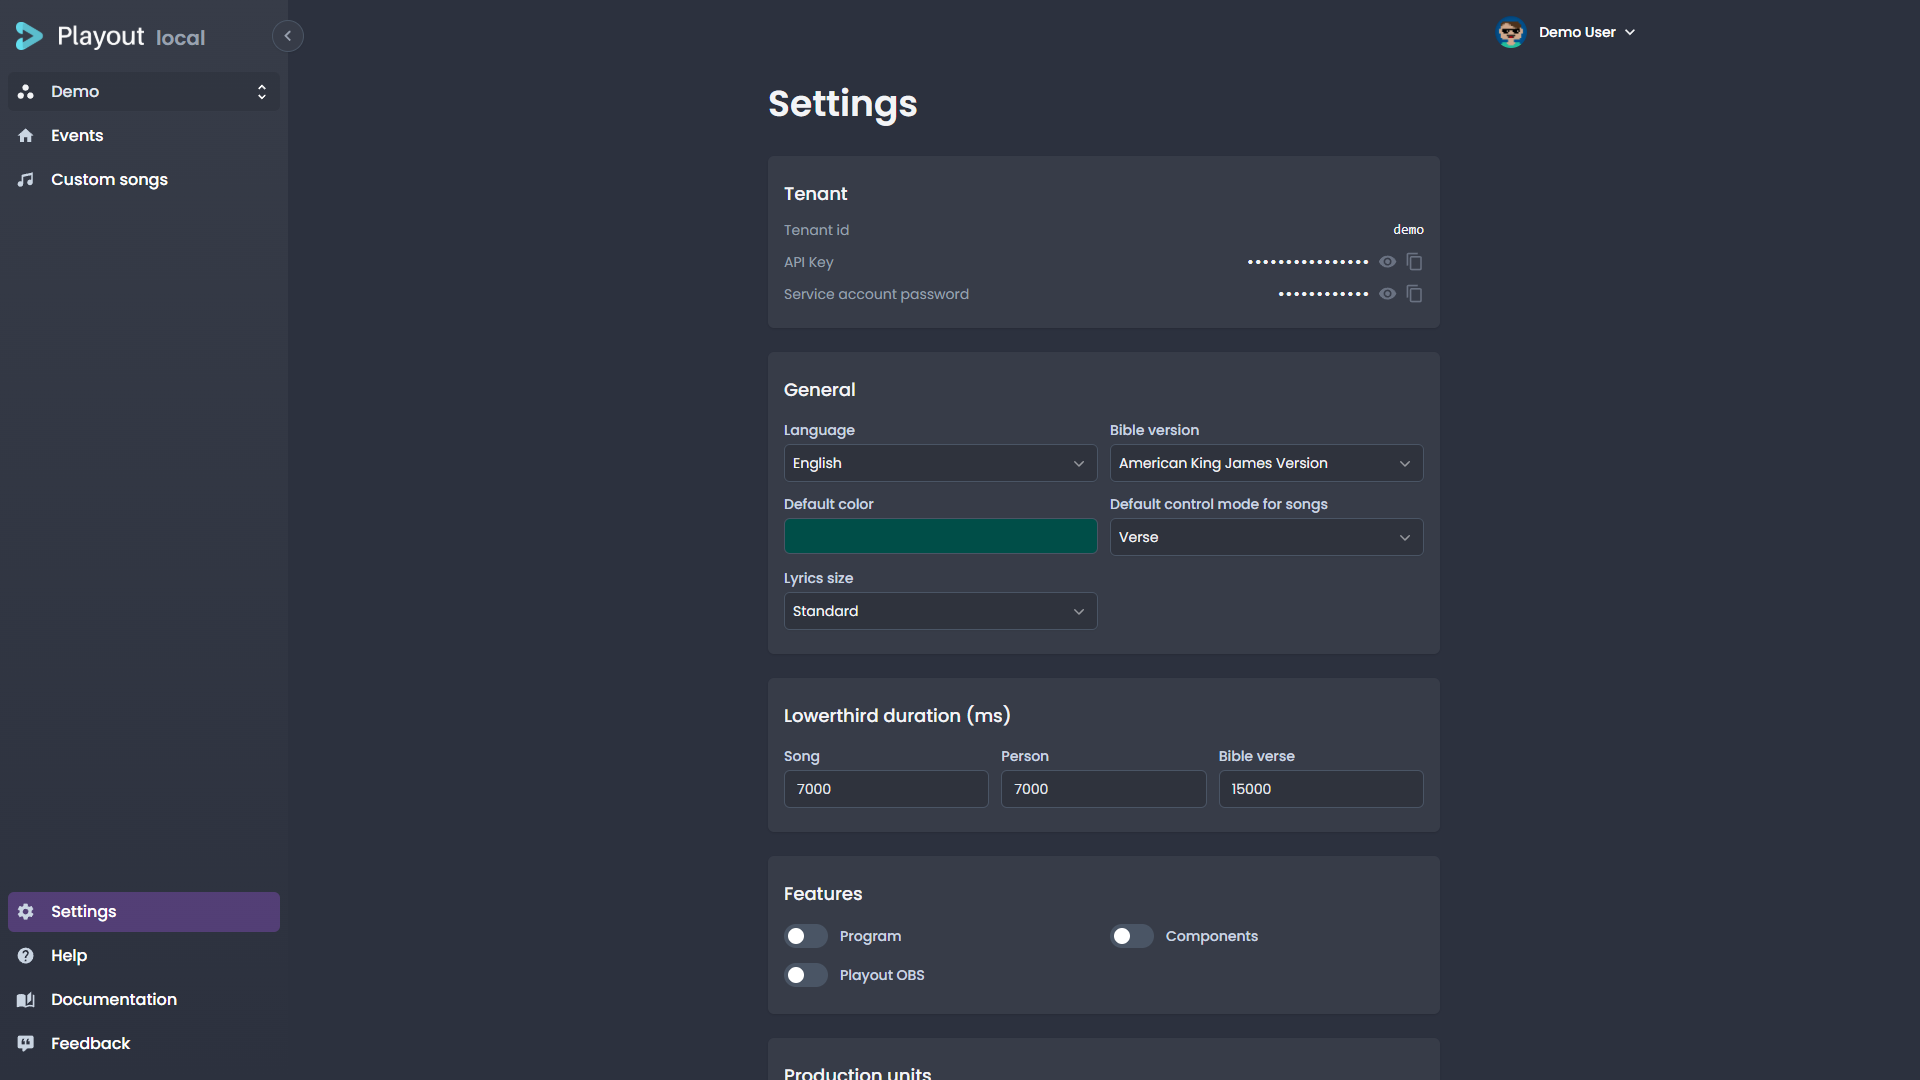
Tenant Information
The top section displays your tenant's core identity:
| Field | Description |
|---|---|
| Tenant ID | Your unique tenant identifier (read-only) |
| Friendly name | The display name of your organization |
| Contact email | The email address shown to team members |
General Settings
Configure the default behavior for your tenant.
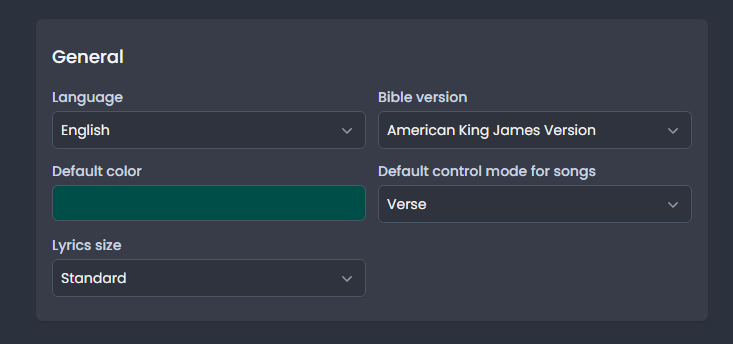
| Setting | Description | Default |
|---|---|---|
| Language | The default language for songs and bibles | no |
| Default color | The default accent color for events and overlays | #004e48 |
| Default control mode for songs | Controls what the "next" action does — advance to the next verse, or to the next lines | verse |
| Single verse (fullscreen) | When enabled, the fullscreen lyrics view shows only the current verse instead of grouping multiple verses per page | off |
| Show side banner | Whether the fullscreen lyrics show the songbook banner beside the text. Turning it off gives the lyrics the full screen width (and a higher default font cap). Can be overridden per event with the Show side banner checkbox on the song control | Yes |
| Max font size (fullscreen) | Overrides the default font cap with an explicit pixel value. Range 20–200. Leave empty for 60 px with the side banner, 90 px without. Lyrics still auto-shrink to fit dense verses; this only raises the ceiling for short verses on tall screens | empty |
| Bible version | The default Bible translation | bibelselskap |
| Timezone | The timezone your services run in. Event dates and start times are entered as local wall-clock values, so this is what turns them into real instants — it is used to anchor the Content Manifest API's eventStart and its offsetSec timeline. Leave it empty and those values are read as UTC, which is only correct for tenants that actually run on UTC | empty |
API Key & Service Account
Your tenant has an API key and a service account password used for integrating with external tools like Playout OBS and the Content Manifest API.
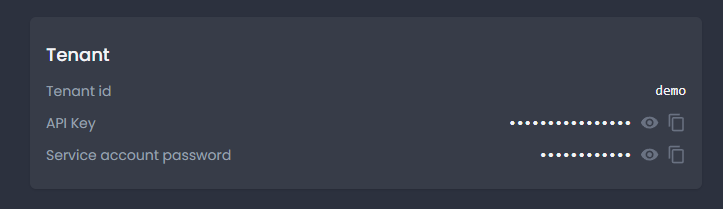
API key. For security, the full key is shown only once — at the moment you generate it. Copy it then and store it in a safe place (a password manager or your integration's secret store); afterwards only a short identifying prefix is displayed.
- Click the generate button to create your tenant's API key
- Click Regenerate API key to replace it — the old key stops working immediately, and every integration using it must be updated
- Lost the key? There is no way to view it again — regenerate it
Keys created before the show-once change remain viewable with Reveal/Copy until you regenerate them.
Service account password.
- Click Reveal to show the credential
- Click Copy to clipboard to copy it
- Click Hide to conceal it again
WARNING
Treat these credentials as secrets. Do not share them publicly.
Lowerthird Durations
Configure how long each type of lower third stays on screen (in milliseconds):
| Type | Description | Default |
|---|---|---|
| Song | Duration for song lower thirds | 7000 ms |
| Person | Duration for person name lower thirds | 7000 ms |
| Bible verse | Duration for Bible verse lower thirds | 15000 ms |
| Show church | Display the person's church name on person lower thirds | on |
| Show country | Display the person's country on person lower thirds | on |
Overlay Appearance & Looks
All overlay styling lives on Settings → Looks. The pill row at the top picks what you're editing: the Tenant default — what every event uses out of the box (its Karaoke tab also holds the karaoke defaults: Lines per page and Reveal pacing) — or one of up to ten named looks, reusable styling sets like "Youth night" or "Christmas". Create a look from the current styling or from a blank slate; rename or delete it from the same page. Deleting a look never breaks events pointing at it — they fall back to the tenant default.
A look also carries the accent colour used by the lower third, the Bible strip and the programme banners. That is where an event's colour comes from: set it once on the look rather than on each event.
Looks only change styling. To set up a whole event — screens and look — use an event template; saving a template captures the event's look, so recurring event types start styled correctly.
An event's look is shown on its dashboard card and picked in Edit event, under Styling. It can also be changed, with karaoke tweaks on top, from the song control's Karaoke panel via Styling… — see the overlay guide.
Each of the three overlay types — Karaoke, Subtitles and Lower third — keeps its own settings; use the tabs to switch between them.
Typography
| Setting | Description |
|---|---|
| Font | The typeface. Each option is drawn in its own face so you can compare them |
| Weight | Light through Black. Bold is 700 |
| Italic | The I button next to the weight toggles italics |
| Text color | The overlay's text colour |
| Text size | Small, Medium, Large or XL — a multiplier on the overlay's own size, so it scales with the screen |
TIP
A weight only looks different if the font actually ships it. System fonts and the built-in webfonts cover the full range; an imported font covers only the weights you imported.
Importing a Font
Click Import font to add a typeface of your own. Imported fonts are shared across all three overlay types and appear at the top of the font list.
There are two ways to import:
- Link — paste a Google Fonts stylesheet URL (the
hreffrom Get embed code, e.g.https://fonts.googleapis.com/css2?family=Bebas+Neue). The family name is filled in for you. Include every weight you plan to use in the link — a weight it omits will be crudely faked by the browser. - File — upload a
.woff2,.woff,.ttfor.otffile, up to 2 MB. One file covers one weight and style. Choose this when the playout machine can't reach Google.
The font family name must match the name the font itself declares, or the browser silently falls back to a default. It is prefilled from a Google Fonts link or the file name; correct it if it looks wrong.
Remove an imported font with the × on its chip. Any overlay still using it falls back to its default font.
WARNING
A Link import is fetched by every screen that renders the overlay, including the live broadcast output. If that machine is offline or behind a strict firewall, the font won't load and the overlay falls back. Upload the file instead when the network is locked down.
Background
Only Subtitles has a background colour and opacity here.
- Karaoke renders straight over the video with no card.
- Lower third takes its background from the event's colour, set on the event itself, so a tenant-wide setting here would silently override every event.
Text Shadow
Pick a shadow style from the swatches — each one previews the effect at your current colour and strength, over a stand-in for video.
| Style | Effect |
|---|---|
| None | No shadow |
| Soft | A blurred drop shadow, offset down-right |
| Hard | A crisp offset block with no blur |
| Glow | A halo centred on the text, no offset |
| Outline | A contour all the way around — the most legible over busy footage |
| Custom | Set the horizontal/vertical offset, blur and opacity yourself |
Strength scales the offset, blur and opacity together for every style except Custom. Shadow colour applies to all of them — a black glow reads as a halo behind light text, while a coloured one reads as an effect.
TIP
Over live video, Outline or Glow stays readable where a soft drop shadow disappears against a bright background.
Event Templates
Settings → Presets shows every event template the tenant has and exactly what each one carries. Pick a template from the pill row; the cards below describe it.
INFO
Event templates were called presets until v2.5, and still are in the database. They are the same thing.
Screens lists the screen layouts the template stamps onto an event, with each screen's sources, background and whether it has extra CSS. Screens are captured from an event, not edited here: open the event's Screens page and choose Save changes to «name» (or Save as new template…) in the template menu. A template with no screens is flagged, because applying it removes every screen from the event.
Event settings and Streaming list the shared settings — look, location, broadcasted state, streaming description, access rules and auto-archive. Each row has a switch: on means the template writes that value onto the event when applied, replacing whatever the event had; off means the template does not carry the setting and the event keeps its own value. This is also where a template saved before looks existed can be given one.
TIP
Colour is not on this list. A template sets an event's accent by carrying a look, and the look supplies the colour. If a recurring event type needs its own colour, make a look for it and have the template carry that. A single event can still override the colour from Edit event.
Rename or delete a template from the menu on its pill. Deleting removes the template and its screens; events it was applied to keep their own copies. Templates cannot be created from this page — see Event Templates for how they are captured from an event.
Feature Flags
Enable or disable optional features for your tenant:
| Feature | Description | Default |
|---|---|---|
| Streaming | Private Mux-powered live streaming, protected so only authenticated users can view (see Streaming) | off |
| Components | Custom abstract overlay components | off |
| Playout OBS | OBS integration and telemetry | off |
TIP
Disabled features are hidden from the sidebar for all users in your tenant.
WARNING
The Streaming feature can only be activated by the Playout team. Contact us at contact@playout.studio to get access.
Keyboard Shortcuts
Customize which keys drive the live output during an event. Each action can be triggered by several keys, so you can keep the arrow keys and add the keys your presenter remote emits.
Songs
The song transport is bound to plain keys, so a presenter remote works out of the box.
| Action | Default keys |
|---|---|
| Next verse / slide | ↓ → PgDn |
| Previous verse / slide | ↑ ← PgUp |
| Karaoke slower | - |
| Karaoke faster | + |
Playlist
These work on the Playlist screen and step the playlist relative to what is on air — not to the row you happen to have selected.
| Action | Default keys |
|---|---|
| Next playlist item | Ctrl → · Ctrl ↓ |
| Previous playlist item | Ctrl ← · Ctrl ↑ |
| Go live / stop | Alt L |
| Playlist banner | Alt B |
| Pause / resume timer | Alt P |
On air
These follow you between screens: they act on whatever you are working on — the song on the Songs screen, the selected element on the Playlist, the person on the Persons screen, the verse on the Bible screen.
| Action | Default keys |
|---|---|
| Show / hide lowerthird | Alt T |
| Blackout | Alt X |
Editing your shortcuts
To add a key, click Add key next to an action and press the key or combination you want to bind — press Esc to cancel. A combination can only belong to one action, and each action always keeps at least one key. Reset to defaults discards every key you added or removed and restores the original bindings; it asks you to confirm first and lists what changes, and the change only takes effect once you save the section.
Shortcuts apply to everyone in your tenant, and the hints on the control buttons update to match your configuration.
TIP
Modifiers are matched exactly, so → and Ctrl → are different shortcuts: stepping the playlist never also advances the verse.
WARNING
Everything that puts something on — or takes something off — the broadcast requires Ctrl or Alt by design, so it can't fire by accident while you type. Shortcuts are also ignored entirely while the cursor is in a text field.
Esc, Enter, Tab, and Space cannot be rebound, with or without modifiers — they keep their standard behavior (closing dialogs, submitting forms, and moving focus) everywhere in the app.
Admins
Manage the team members who have access to your tenant.
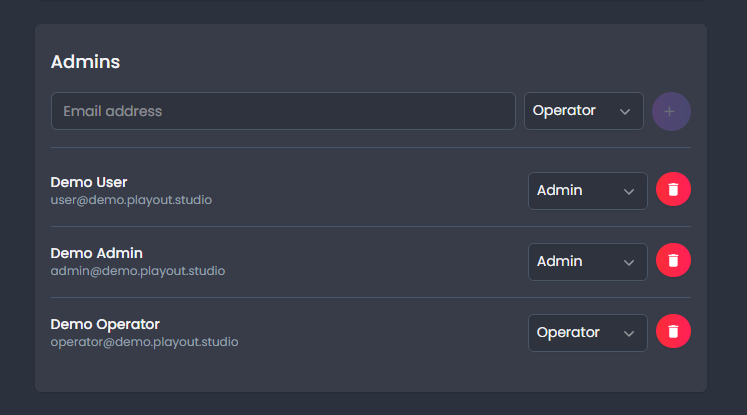
Inviting an Admin
- Enter the person's email address
- Select a role (Admin or Operator)
- Click Add
An invite link is sent to the email address. The invited person uses this link to register and gain access to the tenant.
Roles
| Role | Capabilities |
|---|---|
| Admin | Full access — settings, screen config, admin management, plus all operator capabilities |
| Operator | Event management, overlay controls, and streaming |
Removing an Admin
Click the remove button next to an admin to revoke their access. A confirmation dialog will appear.
Locations
Locations are the venues you broadcast from. Every event belongs to one location, and the location marked Default is pre-selected when a new event is created.
Name a location the way your team says it out loud — the name appears in event lists and in the operator's header.
Adding a Location
Click Add location, enter the name, and confirm. It appears in the location picker once you save the section.
Setting the Default
The default location carries a Default badge. To move it, click Make default on another location.
Renaming and Removing
Use the rename action next to a location to change its name, or the remove action to delete it. Removing asks for confirmation, and tells you how many events still reference that location — those events will show no location afterwards. They are not deleted, and you can assign them a new location individually.
WARNING
The default location can't be removed. Make another location the default first.
Production Units
Production units represent physical or virtual broadcast setups — each with its own stream configuration.
INFO
A location is where you broadcast from; a production unit is what you broadcast with. A venue with two galleries has one location and two production units.
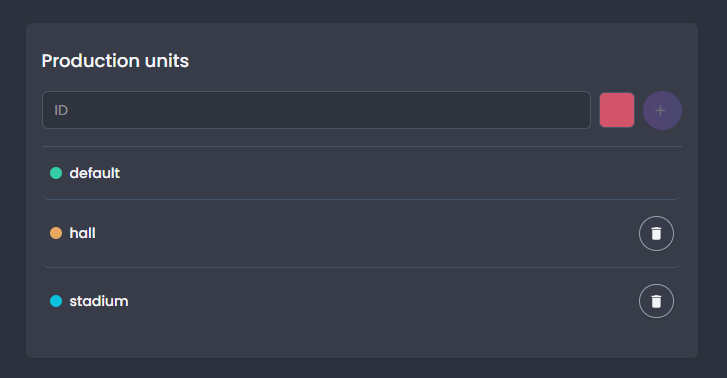
Adding a Production Unit
Click Add and provide a name for the unit. It will be created with a Mux live stream automatically.
Stream Configuration
Each production unit shows:
| Field | Description |
|---|---|
| Ingest | The RTMPS ingest URL and stream key for your encoder (e.g., OBS) |
| Stream status | Whether the stream is active, idle, or disconnected |
Click Sync Mux Stream to refresh the stream status from Mux.
INFO
Admin access is required to view Mux stream details. Operators will see a message indicating this.
Removing a Production Unit
Click the remove button and confirm the deletion. This also removes the associated Mux live stream.
Sharing Links
Sharing links allow you to temporarily share your tenant's person data with another tenant.
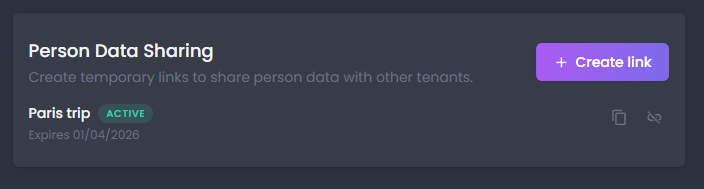
Creating a Sharing Link
- Enter an optional label (e.g., "Summer conference 2026")
- Set the expiration date
- Click Create link
A link is generated that you can copy and send to the receiving tenant's admin.
Link Statuses
| Status | Meaning |
|---|---|
| Active | The link is available to be claimed |
| Claimed | Another tenant has accepted the link — their name is shown |
| Expired | The link's expiration date has passed |
| Revoked | You manually revoked the link |
Revoking a Link
Click Revoke next to an active or claimed link and confirm. The confirmation names the link and, when it has already been claimed, names the tenant that loses access. Once confirmed, the link stops working immediately and the receiving tenant loses access to your person data.
Links that are no longer active can be removed from the list with the delete action. That also asks for confirmation — deleting a link permanently discards its record, including who claimed it.
Claiming a Link
When you receive a sharing link from another tenant:
- Open the link in your browser (you must be logged in)
- Select which of your tenants should receive the shared data
- Click Accept
Once claimed, your tenant's person search will include people from the sharing tenant until the link expires.
Saving Changes
When you modify settings, an unsaved changes indicator appears. Click Save to persist your changes.